Smoke alarms emit a chirping sound that is both specific and irritating. Smoke alarms seem to be particularly adept at starting just as you fall into deep sleep, around 2 am. It was several years ago that a newly installed detector began its persistent chirping. My first thought was that it must have been a defective unit. The battery was changed, and it did not work. Some research on the internet revealed that the cause of the issue is a very small piece of dust which had settled inside the sensor chamber. Even though it is an easy fix, the difficulty of finding the solution in the dark can make you feel frustrated. The beeps or chirps that these devices emit are their way of communicating with us.
This guide will be your best resource in figuring out what your alarm is telling you. You’ll learn the reasons behind the annoying beeping and step-by-step troubleshooting. Also, we will discuss the maintenance procedures that are essential to keeping your alarms functioning properly. The chirp can be caused by a variety of things, from a low battery to a device that is no longer functional. The differences between hardwired and battery-operated systems, dust, and environmental issues will all be discussed so that you are confident with your first line of fire protection.
Smoke Alarm Language and Meaning
Be sure to carefully listen to the sound that the alarm makes before you panic and reach for the ladder. To signal different situations, smoke alarms can emit different sounds. To diagnose a smoke alarm problem, you must first distinguish them. What is the sound? Is it an alarm that blares continuously or just a high-pitched chirp once a minute? It is important to pay attention to the tone. An alarm that emits a full, constant series of beeps indicates that the alarm has detected smoke. But the most common and less urgent sounds are the single or repeated chirps, which signal a need for maintenance.
These chirps come from the device asking for help. The universal low-battery signal is, for example, one high-pitched chirp per 30-60 second interval. This causes most late-night disturbances. The pattern of three or four successive beeps with a brief pause could also signal an issue, such as a malfunction. Or, if you have a combination alarm system, the carbon monoxide detector. Some modern detectors will even tell you the exact problem, like “low battery” or’smoke detection. You should always refer to your owner’s manual when looking for the beeping patterns.
Brands like First Alert, Kidde, and Google Nest can have different ones. When you understand these signs, a nuisance sound becomes a valuable diagnostic tool. This allows you to address the underlying cause of a loud noise quickly.
Low Battery Chirping: The No. 1 Culprit
It is most likely a weak or faulty battery. A built-in feature is used to make sure the battery never dies without notice. The most annoying thing is that it usually happens in the dead of night. Scientists have a reason: when the air in your home cools down overnight, this can reduce the battery’s output, pushing it beneath the threshold for the low-battery alarm. The temperature fluctuations can cause alarms to be more aggressive.
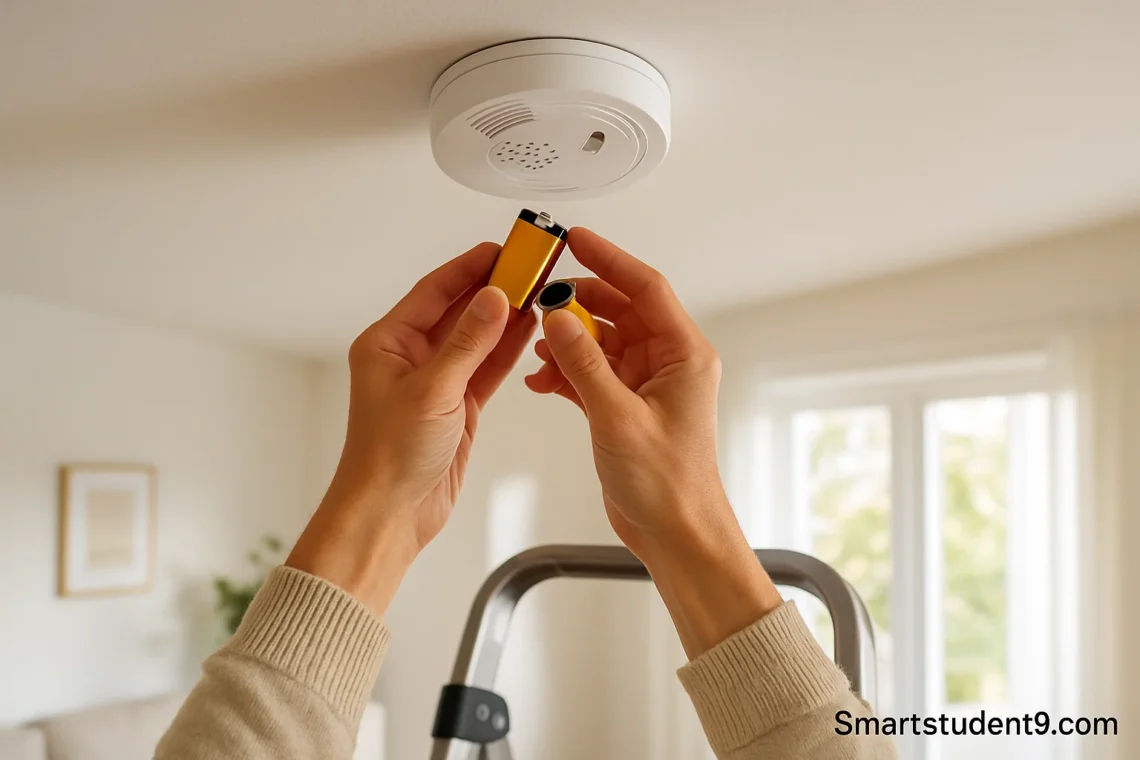
As a rule, this can be easily fixed. The battery will need to be replaced. Nine volts is the most common, but make sure you check for your model. You’ll also need a ladder. Removing the lid of the detector is easy. You can twist some off while others have small tabs. Replace the old batteries, ensuring that both positive (+) & negative (-) are aligned. Then, close the lid and press “Test”. The unit should power on and sound an alarm. When the buzzing stops, the issue is resolved. It’s important to remember that even smoke alarms with backup batteries need to be changed annually. You shouldn’t remove the battery to make the alarm stop making noise. An inoperative smoke alarm can pose a safety threat.
More than just the battery: Debris and dust in the sensor
You may suspect dust, a bug or even an insect if the smoke detector continues to chirp after you have replaced the batteries. The problem was with the newly-installed detector. Dust particles, cobwebs, or pollen can accumulate within the device during or after installation. This debris may obstruct your sensor, leading to false alarms and malfunction chirps. Many alarms use ionisation detectors that are sensitive to obstructions. These sensors monitor the flow and concentration of ions.
The cleaning of your smoke alarm should take place at least once per year or each time the battery is changed. First, you will need to remove your alarm from the mounting bracket. The soft brush attachment for your vacuum will help you remove the dust that has accumulated in the vents of the alarm as well as the internal parts.
Use compressed air, like the one you would use to clean your computer’s keyboard, to blow out stubborn dirt from the sensing chamber. Avoid damaging sensitive parts by holding the can vertically and using small bursts. Replacing the battery is the next step. Then, attach the alarm again and push the Test button. It is often possible to fix the persistent chirping with this simple step.
Phantom Chirp Reset Your Alarm and Residual Battery Charge
It’s frustrating when you replace the old battery with a new one, clean the unit well, and still the intermittent buzzing continues. This ghostly chirp can be caused by residual charges in the alarm’s capacitor. This is because the smoke alarm may not completely reset when the battery is replaced. A small amount of the energy left in the old battery will remain. If the device is not reset completely, it may still be holding a small amount of energy from the old battery. The problem is common and leaves homeowners baffled. Thankfully, it’s easy to fix: perform a reset.
You can reset the smoke alarm by following these simple steps.
- The smoke alarm should be taken down from the ceiling and the wall.
- It’s important first to disconnect the cable if you have a wired model. To remove the clip from the wire connector, you may need to rotate the unit.
- Remove the batteries.
- While the battery is removed, hold down the Test or Silence button and press it for approximately 15-20 seconds. This will remove all of the charge left in the capacitor.
- Install the new batteries, connect the power harness, if this is a hardwired alarm, and reconnect the alarm’s mounting bracket.
- To confirm that it works, press the button to test again.
This forces the device to recalibrate to the new power supply and should eliminate all false chirps due to a residual battery. Often overlooked, this is a crucial step when it comes to troubleshooting faulty smoke alarms.
Environment factors contributing to false alarms, chirping and other noises
Smoke alarms are sensitive and can react to smoke-like conditions. Smoke detectors may be sensitive enough to detect conditions that look similar to smoke. These false alarms could lead to frustration or malfunction chirps. Humidity is one of the main causes. When your alarm is placed too close to the bathroom, steam can be emitted from the shower and trigger it. In the same way, fumes from cooking, grease in the air or a dusty cloud caused by a construction site can trigger an alarm. Extreme temperatures can also impact the performance of your alarm and its battery life.
Other environmental causes include drafts. A smoke alarm placed too close to an open window, a closed door or a heating and air conditioning vent may cause issues. Dust and other particles can be blown into the detector by moving air, resulting in chirps. Some photoelectric alarms are triggered when direct sunlight shines into the sensor. You should always check where the detector is located when you have a persistent alarm or hear it chirping. Installing alarms 10 feet or more away from stoves and bathrooms is recommended by the National Fire Protection Association. It may be enough to relocate an alarm in order to solve the problem.
There are key differences between battery-operated alarms and hardwired alarms
You can choose between two basic types of power for smoke detectors – battery or hardwired. The difference between the two is essential for troubleshooting and maintenance. These alarms run solely on batteries. Hardwired Alarms have an electrical connection to your house and a backup battery for power outages. Habackup interconnected alarms are required by most building codes for all new construction. That means, when one alarm detects any smoke, it will trigger the other alarms simultaneously. This gives a better warning in homes with large rooms, as well.
There are specific considerations to be made for the maintenance of each. This comparison can help you better understand the pros of each.
| A Feature | Batteries-Powered Alarms | Hardwired alarms |
|---|---|---|
| Installation | It is easy to install. Anybody with a hammer and a screwdriver can easily do this. | The wiring in the house is often more complex, and this requires a qualified electrician. |
| Powersource | Only use batteries that are sealed (e.g. 10 10-year or 9-volt sealed lithium). | Powered by the 120V circuit in your home with backup. |
| The battery is responsible for the functionality of this device during outages. | The fact that it operates on the mains is a major plus. This device is designed to work in the event of a power outage. | |
| Maintenance | It is necessary to replace and test batteries frequently. | The backup battery should be changed. It is necessary to back up the circuit breakers to see if they are losing power. |
| Wireless interconnection is available on some models; however, the standard models are stand-alone. | Alarms can be interconnected so that they all sound at the same time, thus providing better protection for your entire home. | |
| In general, upfront costs are lower. | The initial costs are usually higher, especially in cases where professional installation is required. |
Whichever type you use, they both need to be tested and cleaned regularly. Hardwired alarms can make a buzzing noise if there is a problem in the connection. This could be a circuit breaker or an electrical issue.
An easy-to-follow checklist for troubleshooting smoke alarms
Instead of reacting with frustration when you first hear that annoying chirp of the bird, having a clearly defined plan is helpful. Follow a logical process to identify and fix the problem. This list is intended to guide you through common problems from the simplest to the most complex.
- Recognise the Sound: Initiate by determining if it is just a chirp, indicating a low battery or fault. Or if there are multiple chirps (smoke/emergency) and a complete alarm. It’s an alarm. Prioritise safety by evacuating. Proceed to step 2 if there is chirping.
- Install a new battery. It is usually the easiest solution. The old battery should be removed and replaced with a quality, brand-new one. Ascertain that the battery is correctly installed.
- Reset the detector: if the new battery does not work, you can drain any residual charge. Removing the detector will allow you to remove the battery. You can then hold the button of the tester for 20-30 seconds. Replace the battery in the detector.
- It’s Time to Clean Your Alarm. To clean out the sensor chamber and vents, use compressed air with a brush attachment on your vacuum.
- Consider Environmental Concerns: Assess where the alarm is located. Do you have an alarm that is near sources of humidity or steam? It may be possible to relocate the alarm. Be sure to check the unit for any temperature fluctuations or sun exposure.
- Make sure your hardwired units are working: To verify power for a unit that is hardwired, you should check to make certain the circuit on which it runs has not tripped. When the AC power goes out, it will make the unit chirp.
- Look at the expiration date.
What to do when you need to replace your smoke detector
It is not possible to make smoke alarms last indefinitely. The alarms have an extremely limited lifespan. They’re important safety tools that are subject to degradation over time, even if they pass the tests. U.S. Fire Administrations (USFAs) and NFPAs both suggest replacing smoke alarms in the home at least every 10 years. This is more than a simple suggestion. It is an important safety rule. It’s possible that an old alarm will not be able to detect smoke in real-life fires, leaving you and your family with less time for escape.
You can find out the age of your smoke alarm by removing it from the ceiling. There will be a sticker with the manufacture date on it. It’s important to change it if your alarm is more than 10 Years old. Some alarms even have a printed expiration date. It’s also a sign of a faulty unit if the alarm continues to malfunction or chirp even after all other troubleshooting procedures have been tried, including resetting, changing the battery and cleaning the unit.
New alarms are a good investment for your peace of mind. If you are replacing your old alarms, upgrade to dual sensor models with both ionisation (using a photoelectric sensor) and ionisation (using an ion-sensing device). This will provide the best level of security.
You can use this checklist to ensure a peaceful, protected home.
Smoke alarms are more than an annoying device. They’re a warning system that may one day help save you. Understanding the signals of your smoke alarm will help you quickly find the cause and protect your house. Maintenance of smoke detectors is important for home security. Whether you’re replacing batteries, cleaning dust out of them, or realising that it’s past time to change the alarm, it all starts with the simple act. Simple tasks like these can help you avoid sleepless evenings and offer reliable protection at the most crucial times.
This chirp is not something to ignore. This chirp can be used as a warning to make sure you check all smoke and CO detectors at home. They should be tested monthly. Batteries need to be changed annually, except if you own a 10-year sealed unit. And the whole device needs replacing every decade. Make these habits a part of daily life to ensure that you are always prepared for fires.
Read More: Frehf: The New Language of Digital Innovation and Creativity